Friday, April 27, 2012

Daytime Chicken Tractor PVC Hoop Coop

The 2 most important things you will learn about chicken is that they poop. Lots of poo! And, they will get into trouble.
I want to let them pasture all day if they want but, I just cannot be there to watch over them. Predators can get them, they could go into the road, they could will scratch up my garden and poop all over the deck.

I also wanted to be able to keep the birds in one spot so they could "mow" and fertilize for me.

Solution: Chicken tractor! Perusing the inter-webs for ideas, there are several great ones, I decided on the PVC hoop style. Reasons: lower cost & lighter weight

in progress
I had 2 long treated 2x4 and 2 short ones that were salvaged from a section of the deck that was dilapidated.
Free, outdoor friendly, and re-using materials that would otherwise fill the landfill.

I also have long screws that were from the same salvage operation.

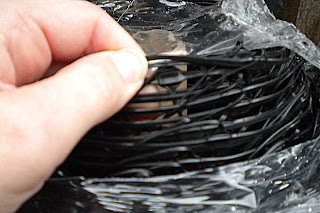
I bought a big roll of chicken-wire to use for protecting my baby fruit trees and will use that for the cover to keep the hawks out and the chickens in.

I had to purchase the following:

flexible PVC 50 foot roll 1/2 inch $15
pack of pipe straps $2.50
wheels and hardware to attach them to the runners $18

Notes:
the corner 2x4 are dual purpose: bracing/stability AND for chickens to stand on.
The entrance corner has double brace because I wanted a place to put the water and feed.
i had to use the flexible pvc because the regular  would snap and break as the tractor is only 4'wide.
The shade cloth is leftover frost blanket for gardens.

I get the girls in there by playing fetch the treats. throw the treat in there and they go get it - easy.


So here is how it turned out:

Happy and safe foraging!
Remarkably sturdy
Remarkably lightweight
I can move it laterally by lifting and moving one end at a time over to where I need it.

I am pretty sure I am going to trade out my salvaged strap handle with a longer rope handle. Why: so I won't have to bend over as much to pull it and so me hand won't get squished between handle and door.

Downside is I have to wait till they all have laid before I can put them all in at once.

It occurred to me this is slightly larger than the width of a garden row. What a great way to have the chickens do tilling work for you!

All I need is a mini feeder and some more clothespins to hold down the shade cloth.

There are so many cool tractors out there on the web. Mine was a fly by the seat of my pants one (no plans)
It took 3 days to build ('cause I also have other things to do besides build tractors).
I tried to use as much of what I already had.
If you have any questions about my project please comment.


This post joined the Chicken Chick Blog Hop Here

Wednesday, April 25, 2012

Stinging Nettle Stuffed Ravioli

If you liked stinging nettle Linguine, you are going to LOVE my Stinging Nettle Ravioli Recipe!

Urtica dioica
I ventured out the other day to get the last of the stinging nettle in hopes for a big harvest for drying and freezing. I had 2 HUGE bags, leather gloves, wellies and kitchen snips ready to go and headed out to the nettle trail. Highly disappointing on the amount of harvest-able nettle (for food that is, I heard you can also use the grown for fiber like linen - how cool).

Anyways, the nettle was too high and much of it was severely damaged from the recent trail maintenance (hubby and string trimmer).
Oh well, I had a great time in the great weather teaching my daughter how to harvest nettle and we came back with a decent amount.

This time I took my own advice and harvested by leaf and tip, only carefully picking the best so no dangerous sorting had to be done in kitchen. Great advice! All that was left was a cold water soak, triple rinse and in the pot they went. I did save a bit for the experiment of drying.

Drying nettle (what I did):
Not wanting to heat up the oven for my few leaves, I placed the rinsed leaves in a single layer on a paper towel and placed on the middle rack in the toaster oven. Set to bake at 150 degrees with the door half open, it took about 30 minutes to dry. I crumbled them up (they don't sting anymore) and put in a snack baggie. Now to find ways to use them over the summer.

Our Sufficient harvest
Stinging Nettle Tea: I tried stinging nettle tea. I did not like it at all - and I love teas of all sorts. This tasted like spinach water. If that is what you like - go for it. I will pass.

I got about 1 cup of nettle mush from my harvest and chose to freeze it till i figured out a new recipe.
Freezes great! Just place mush with enough of the nettle water to cover the mush in a freezer container size of your choice and freeze. I chose a small one cup size. This may be too big. Many folks use ice-cube trays and make little convenient ice-cube sized portions - brilliant!

Later that evening it occurred to me to make ravioli.

Here is my ravioli recipe YUM!


Stinging Nettle Ravioli


Ingredients


Filling:

1 14oz container of ricotta cheese
1 cup of shredded Monterrey jack cheese
1/2 tsp ground black pepper
1 tsp course sea salt
1 egg
1 garlic clove minced
1/4 cup stinging nettle, boiled, squeezed of excess liquid and chopped

Pasta:

3 cups flour (can be semolina but i just used regular unbleached white all-purpose)
3 eggs
1/4 cup olive oil
1 tsp salt

Extras:
  • about 1 cup flour extra for pasta rolling
  • about 1 tsp salt for water boil (optional)
  • 1 egg all mixed up in a bowl for egg wash for sealing the pockets
  • a fancy pasta cutter/sealer for the edges (I just used a roller from my daughter's play dough accessories kit - works great because it is not too sharp so it seals the layer and makes a fancy squiggly design at the same time).

Equipment:
  • large pot for boiling pasta
  • stand mixer for pasta if you don't want to use hands too much
  • rolling pin or if you are so blessed to have a lasagna pasta roller on your stand mixer  - lucky you!
  • pasta strainer

Method:


mix all the pasta ingredients together in the bowl of your stand mixer with the dough hook (or a large bowl by hand) till a smooth dough ball forms. Depending on the size of your eggs, you may have to add a tiny bit of water if the mix is too dry.

Let the dough rest for 10 minutes or so.
While it is resting you can make the filling and get a pot of water on the stove to boil.

In a medium bowl, mix all the filling ingredients together until well mixed.

if rolling pasta by hand:
Divide dough in half and roll out 2 similar sized sheets about the size of a cookie sheet.
on one sheet, paint the top side with the egg wash.
place 1 tbsp of filling, about 1/2 inch from the edge and continue placing balls of filling in straight rows leaving about a 2 inch space between each ball.
Place the 2nd dough sheet on top of the balls . Using the cutter of your choice, cut and seal the space between each row and column to make a ravioli.


if using pasta roller:
make sheets of the lasagna pasta and seal a tablespoon of filling between 2 sheets of pasta.

When water is at boiling place enough ravioli carefully into the pot to leave enough "wiggle room" between the raviolis. Overcrowding the pot created boil over and stuck together and popped open pastas.
I had to do mine in 4 batches. I just transferred the raviolis from the pot to the strainer via slotted spoon.
Fresh pasta only takes 5 minutes to cook.

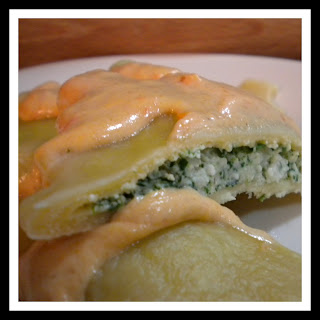
I served this with Bertolli's 4 cheese rosa sauce and it was a perfect match.
the little toy roller works great


I will again reference the University of Maryland Medical Center for health benefits.

NOTE: My hubby got stung this weekend and says that he felt a slight sting but it was not really painful. It lasted for about a minute or so and then dissolved into a prickly sensation. He described the sensation as similar to a topical analgesic or a product like icy-hot and it lasted for several hours.


Some ads for products you may find useful for making this recipe (and some attachments for the KitchenAid would make lovely gifts. Ahem & wink ;-) :


shared with:

Tuesday, April 24, 2012

Mystery Plant #1

Mystery plant #1 - Oplopanax horridus

aka. DEVILS' CLUB, DEVIL'S WALKING STICK, ALASKAN GINSENG
Oplopanax horridus,  is derived from two Greek words: hoplon, meaning weapon and panakos meaning panacea, a hypothetical remedy for all ills or diseases, once sought by the alchemists. Horridus meaning
horrible, frightening refers to plant being covered by thorns.
source: http://homeopathyvancouver.com/wp-content/uploads/files/ophopanax.pdf

 Disclaimer: NOT INTENDED AS MEDICAL ADVICE purely informational only.

Personally, I do NOT recommend the use of this herbal remedy unless under the supervision of a physician. Just read the homeopathy provers' results.


A plant we found in the wetter area of our property. April 23, 2012

the grove may 7th 2012

hubby says spines are not stiff
And, what a remarkable plant it is!


This mean looking plant with a mean sounding name is really quite amazing.


This ginseng relative has been used by natives for a variety of ailments. Even the highly toxic red berries are used as a lice-killer. Even to this day, scientists are researching this plant as a cure for tuberculosis.

My husband said (as he touched with leather gloves) that the spines are soft and flexible. Don't be deceived. This plant will hurt, although it has no injection of chemical as does the nettle, the spines still pierce skin, hurt, and can cause a secondary infection from the injury.


a bud


These plants are very slow-growing and are mainly found in undisturbed old-growth forests. Lucky we have such a treasure hidden  here.


Found in Eastern Pierce County, Washington. soil conditions are wet in winter and spring. possibly wet feet conditions. Sun is dappled in winter and shaded in summer.


Possibly didn't notice last year for all the nettles.

hubby next to a stick - hubby is 6' tall

Botanical Plant info 

go to USDA site link here: http://plants.usda.gov/java/profile?symbol=OPHO


 Growing guide

Plant Group:
Shrubs.
Hardiness:
USDA zones: 3-9.
Flowering period:
Late spring to midsummer.
Light:
Shade.
Soil:
Moist, acidic, and does well next to seepages, creeks and ponds. summer drought tolerant
Propagation Methods:
Sow seed when ripe. Seed may take up to 18 months to germinate.
Stem cuttings from horizontal branches in late spring to early summer.
Layering.
Pruning Methods:
Very painfully!

source: http://www.rainyside.com/plant_gallery/natives/Oplopanax_horridus.html


Cool Facts:


  • seeds can take up to 4 years to germinate
  • leaves can reach a width of 3 feet across
  • can grow up to 20 feet tall
  • Bears love the poison fruit.
  • Many uses


Uses

Great site for uses of all sorts   http://cms.herbalgram.org/herbalgram/issue62/article2697.html

spiritual, medicinal, cultural


Another source: http://www.herbalremedies.com/devils-club-information.html

Another source: http://www.pfaf.org/user/Plant.aspx?LatinName=Oplopanax+horridus
Devils Club
  • roots can be cooked and eaten.
  • young fleshy stems are edible when cooked.
  • young leaves lack the stiff spines and can be eaten raw.
  • berries are not edible.
  • grows in moist areas that are shaded from the sun, in both foothill and montane regions.
  • warning: plant spines can cause infections or allergic reactions.
source: http://northernbushcraft.com/plants/devilsClub/notes.htm


Proof of Uses

Great site of a detailed blind trial of the effects of devils club.
http://homeopathyvancouver.com/wp-content/uploads/files/ophopanax.pdf


7 May 2012


What is new is the growth and appearance of the sprouts.


top of stem 7 may 2012


They are classified as a shrub but are single stemmed.


The base pictured is not one shrub but rather several individuals.

7 may 2012 base of cluster

A few sprouts that I pulled from a path seemed to be rhizomatic.


the grove 7 may 2012


May 27 2012


bud & branch has grown
top of stalk has flowers


ooh spikes.


the grove in late may green!


June 17 2012


Hungry for Tex-Mex!

Tex Mex Week!


The Pacific Northwest has a lot going for it! Sadly... Tex-Mex is NOT one of those things!
After returning from Texas spring break and missing the opportunity for some good Tex-Mex, I went on the prowl for a Tex-Mex menu ~
Results following.

Sunday


Chorizo de Rez y Huevos

Egg and Beef Sausage Skillet


Ingredients
Chorizo de Res
1/4 cup of following, diced: onion, green bell pepper, red bell pepper, yellow bell pepper, orange bell pepper
5 eggs, scrambled
Cotija cheese.
Corn tortillas.
some butter for frying the tortillas (about 1 tbsp)

In large skillet on medium heat, cook chorizo.
Add diced vegetables and cook till onion become slightly soft.
Push cooked meat mixture to one side of skillet. Add eggs to other side of skillet and cook till done.
Mix the eggs and meat mixture. Take off heat.
Lightly fry corn tortillas in a thin layer of butter in a skillet on medium heat. They only need about 30 seconds on each side - just so they get soft. Store tortillas in a tortilla container or on  a plate and cover with towel until ready to serve.
Serve egg sausage mix sprinkled with cheese. One may eat with or without tortilla.


Enchiladas Suizas


Sorry for terrible pic - It tastes so much better than pic looks.
Ingredients:

3 skinless boneless chicken breast halves
3 cloves garlic
1 tablespoon butter
1 onion finely chopped
1/3 each of the following finely chopped: green bell, red bell, yellow bell and orange bell peppers
2 cups shredded cheddar cheese
1 (4oz) can diced green chile peppers
1 cup fresh, finely chopped cilantro
4 tsp cumin powder
12 flour tortillas
2 cups shredded Monterrey jack cheese
1 cup heavy cream
1/2 cup chicken broth

I modified this recipe from Allrecipes found here.
I ended up having to bake for 45 minutes covered and 15 minutes uncovered to cook all the way.
I let it sit for 15 minutes to cool.


Monday


Flan


Ingredients:

8 eggs
1 (14 oz) can sweetened condensed milk
2 tsp vanilla extract
1 1/2 cups white granulated sugar
1/2 cup heavy cream

Preheat oven to 300 degrees F.
You will need a kitchen towel, a 9 inch pan for the flan and a larger pan for the water bath (I used a 13x9 inch casserole dish) and a heavy sauce pan for the caramel sauce.
 Blend the eggs, vanilla condensed mild and cream till well incorporated.
Heat the saucepan on medium heat and add the sugar. Do Not stir the sugar or it will crystallize. when almost melted, you may push the liquid around carefully with a spatula in order to melt all the way. Take off heat and pour into the waiting flan pan and coat the bottom evenly. do not touch the liquid sugar as it WILL Burn you! Be careful not to over-cook or burn the sugar.
Pour egg mix over the sugar.
line the large pan with the towel, place the flan pan on the towel and carefully fill the larger pan up to halfway up the flan pan.
Bake 60 minutes or till knife inserted in center comes out clean. Be careful not to over-cook the custard.
1st Flan Fail
Remove flan pan from water bath and set aside to cool completely.
Run knife along edge of flan to loosen.
Place serving dish on top and carefully and quickly invert.
serve warm or cold.


A few things I learned about Flan...
The caramel sauce is difficult. It takes a while to melt but once it starts it goes pretty fast. It helps to have a heavy saucepan so that it heats more evenly.
caramel sauce fail = yummy candies
The custard can be made creamier with the addition of ... cream.
The 1st flan I did not use cream and it came out much like scrambled eggs. I found a recipe that added heavy cream. I tried it and it seems the more cream the more custard like it becomes.
It is easy and not good to over cook the custard. Keep an eye out toward the end of the cooking to be sure not to over-cook it.
I made many mistakes in the sauce - one of them turned into caramel candies.

The photo of the good flan has candied sugar on top because of the sauce fail. But, my hubby said it made it extra delish and liked the crunchy  texture with the smooth custard. Hopefully next time I make flan I can replicate the oops.


Missing a few days? Yup, busy week with the kid getting orthodontics and other appointments. But, we had PLENTY of leftovers!


Wednesday


Caldo De Res

Beef Stew

Ingredients

1lb beef stew meat
1 tbsp vegetable oil
2 tsp salt
1 finely chopped onion
1 (14oz) can diced tomatoes
2 cups beet broth
1 cup water
2 carrots chopped
1/4 cup chopped fresh cilantro
2 potatoes diced
2 ears corn, husked and cut into thirds
1/2 head cabbage chopped
1/2 bottle beer (shiner bock) optional

In large pan, brown meat in oil with salt. Add onions and cook till soft. Add can of tomato, beef broth and water. Cover and simmer for 1 hour. Add carrots, potatoes, cilantro, corn and cabbage and beer (what you do with the other half is up to you ;-) & simmer for an hour or until potatoes are cooked and meat is soft. Serve warm.

The whole family thought this soup was great! We served with cornbread.
The whole ears of corn look cool but, to make it easier to eat, I would substitute it for about 1cup of off-the-cob corn.


Thursday


Barracho, Charra, Cowbow Beans

Frijoles Charra


1 lb dry pintos
1 head of garlic, peeled (and chopped optional)
1 tsp salt
2 cups bacon ends and pieces
1 onion, chopped
1 large fresh diced tomato
1 - 2  large fresh jalepenos, chopped
1 cup of fresh chopped bell peppers (any color or combination)
1/2 bottle beer (optional)
1/2 cup chopped fresh cilantro

Go through beans and remove any rocks or yucky beans, rinse, place in pot and cover with water. Bring to boil and boil for 20 minutes. Take off heat, add water to cover if necessary and let sit for 30 minutes. Rinse beans and set aside.
Return empty pot to heat and cook the bacon till cooked but still tender. Add the onions & peppers and cook till almost soft - about 10 minutes. Add all other remaining ingredients and beans. Mix and cover beans with water. Cook on low heat for 4 hours or till beans are soft. Keep an eye out on the water level and add water as needed and stir occasionally.


Refried Beans


The musical fruit LOL

Oh, I bought a HUGE bag of beans. Enough to fill my big slow cooker for the Charros and enough to fill a big pot for re-fried.
I started them both the same by boiling, rinsing and then simmering with whole cloves of garlic and salt.
For the re-fried I just dumped them after cooking for hours on end, into my food processor and gave them a-whirl till super smooth. Oh, you have to put some of that bean water in there too. It's OK if they are soupy. You are gonna get a big iron skillet hot over medium-hi heat with about 2 tbsp of oil (we are going healthier here but, you can go old school style and use lard). Then I pour the soupy bean mush in and stir occasionally till it is cooked down to the re-fried consistency that you like.
MMMM so good! Add salt to taste.


Friday


Tres Leches Cake


This is my most favorite cake EVER! This is the 1st time to make it myself and I decided to go with a pro...
My foodie crush...
Alton Brown.

Here is the link to his recipe. You will need a scale for his recipes.

The only thing I did different was increase the vanilla to 2 tsp 'cause I LOVE VANILLA!
 Oh... and I added slices strawberries on top because it is just yummy!
I'm in a sugar coma!!!!!

Review:
Oh Alton :-( ...
Your cake is WAY TOO SWEET! I am going into sugar coma!
 I am pretty sure I will be cutting the sugar dose in HALF next time and it will be ok!
HOLY MOLEY ... 2  MucH  sSuggRr! (my sugar coma talking).


Beef Enchiladas  - white-trash-tex-mex style


Ingredients:
1lb ground beef
1 medium onion finely chopped
3 garlic cloves minced
1 tsp cumin
1/2 tsp red pepper powder
1 tbs paprika powder
1/2 cup Velveeta - the white kind

2  14oz cans enchilada sauce
2 cups shredded sharp cheddar cheese
12 corn tortillas

Supplies:
large skillet - about 12 inch x 2 inch deep, food processor, oven-safe casserole dish - about 8x11 inch

Method:
In large skillet, brown beef, add onion & garlic & cook till onion is soft.
grind it up real fine like dog food
Place mixture in food processor and blend till meat is fine texture. Return mixture to skillet on low heat and add spices and cheese and 1/4 cup of enchilada sauce. Mix till combined and cheese is melted.
Pour 1 can of sauce into the bottom of the casserole dish & evenly coat bottom.
Distribute the meat mixture evenly to fill each of the 12 tortillas. Roll the mixture up in each tortillas and place evenly in the dish.
Pout the remaining sauce over the tortillas and cover with the shredded cheese.
Bake @ 350 degrees F for about 30 minutes till heated through.

This time I didn't use the Velveeta because I cant find it here easily so I used about 6oz of queso fresco and 1/4 cup shredded Monterrey jack instead.

Each time I make this it always seems a bit better after it has sat in the fridge overnite.


Saturday


Huevos rancheros


Ingredients

sauce:
1 onion diced
1 cup diced tomatos, fresh
1/2 cup diced fresh tomatillos
1-2 jalepenos, diced fine
1 tsp cumin powder
1/4 cup fresh chopped cilantro

3-5 eggs depending on appetite
6-10 corn tortillas
1 or more tbsp oil for frying the tortillas
 1 cup crumbled queso fresco or cotija

Method:
fry tortillas one at a time in a thin layer of oil over medium high heat in a large skillet. Place tortillas in a tortilla keeper or on a plate on and under a kitchen towel.
reduce heat to medium and fry the onion in remaining oil till almost soft and add jalepenos. Cook for about 5 minutes then add the remaining sauce ingredients. Cook and stir occasionally until tomatillos are soft and a sauce thickens in pan.
Fry eggs separately sunny side down.

Serve warm by placing one tortilla on serving plate, top with a fried egg, top with sauce and sprinkle of cheese and top with second tortilla.


I will try to get a photo but, I keep eating it all b4 I think about snapping a shot. It's so yummy!


There were more recipes that I din't get to:
1 - the week was a busy one
2 - there was alot of food and I don't keep alot of storage containers around anymore.
Happy eating 'yall!

some ads for items you may need for Tex-Mex cooking:
I LOVE my lodge cast-irons!


Monday, April 23, 2012

Sick Chicken


This post is about an ill chicken.
Please be advised that I write about some gross stuff.
Also, as with all my posts - This is NOT medical advice!
This is just writing about my experiences - there you go.

Patient:
Pullet
about 8 months old
about 4.5lbs

Symptoms:
Watery, odorless diarrhea
lethargy and silence
loss of appetite
increased thirst
Wattles and face were redder than the others - maybe fever?


Saturday I noticed my gold-laced Wyandotte Ginger was ill. She seemed egg bound as she was hiding out panting in her nest box all morning.
I took her out of the box to examine her and "force" her to eat and drink something.
She ate a little and drank alot. Then I noticed she was having trouble passing clear diarrhea. She walked around very slowly in the run for about 30 minutes before returning to her box.
Note - the night before she layed the egg in the hammock during the nite.
She remained in her box all afternoon  - no egg.
But, she remained slow and mopey. I decided to see if she would recover over nite naturally.
I let her stay with the flock thinking she may be worn out from a difficult egg. I decided to keep a closer eye on her the nest day.


 Sunday morning she was down from the roost but was lethargic and would drink a lot but not eat. She wouldn't even make chicken noises. She had layed an egg in a nest box sometime since we put them to bed last nite.

I separated her by isolating her to the run and let the others pasture and have access to the coop all day.
I gave Ginger a handful of feed and a bowl of water with ornacyn-plus.
She drank the water but would not eat or scratch . She was only interested in drinking and laying in the sun.
I was hoping not to have to cull her.
She did not mind being away from the flock.
She just laid around and drank water. No interest in scratching or eating.
I soaked her bum in warm water and cleaned off as much of the gross that I could without traumatizing her too much.
She continued to have watery, odor-less diarrhea all day.

By 2 hours before sunset, she was holding her wings a little higher and starting to walk around.
She still would not eat her feed or earthworms but ate a few grubs and small beetles I threw at her.
An hour later she started eating her feed and ate a spinach leaf. She started to make a few chicken sounds when we approached.
By the time sunset came, I determined she was well enough to sleep in on the roost with the flock.

Monday I separated her again in the morning and gave medicated water. She was feeling so much better by then that she dumped the water and was pushing on the gate to go out with the flock and forage.
I let her out. She was noticeable slower than the rest of the girls but was still interested in eating greens and scratching for bugs albeit in slow motion.
It is more difficult to administer meds to chickens that are feeling better. I mixed the ornacyn-plus powder with shredded cheese, quinoa and bran to make a small antibiotic treat mush. She enjoyed that and ate it up.
I let her join the group today and will be keeping an eye out on her and the others for signs of illness.
Afternoon: she has been slow and still showing signs of illness: sleepy eyes, slow. But, she is up and eating and drinking and even took a bath and is laying in sun with her friends.
Evening: she is back to about 75% herself. Stools still loose but have solids in them.Still a tad slower than normal but is back to running in short bursts. I think I can handle this recovery.

I will continue to give her a dose a day (29mg per day) for 5 days as with all antibiotic treatment you have to keep taking the dosage even when you feel better.

After she is back to normal speed, I will give the girls some probiotics to help restore her system.

Wednesday
Yesterday she gave me a chase around the tree while trying to avoid her morning meds. Although she seemed to slow down in the late afternoon. Was sleepy after foraging but, still held wings and tail normal.
Today she was acting like a normal chicken. Still sluggish in the PM but not as much as yesterday. I would say she is at about 85-90%. Poo is getting more normal. fed tablespoon of yogurt to each girl. Ginger did not lay today or yesterday.


Friday
All better! Off meds. She is back to being a regular chicken. Still no egg.
All better and taking a bath with her friend.

I will have to ditch her eggs for the duration of the treatment time plus seven days after just to be safe.

About my method of treatment:
I prefer to let nature do it's best and only step in and use medications as a last resort. Nature knows best. But, I also do not let my creatures suffer, nor do I want to loose my flock needlessly. I also do not want to spend a stupid amount of financial resources to save one bird. I love them, but they are not people.


Ginger does seem to be a less-healthy bird then the others. This would be the 2nd time she has gotten ill since I got them 6 months ago.

I scoured the web and the Merek Vet manual and could not find any illness that matched her symptoms. Maybe she just is immunodeficient.

Final UPDATE 4/30/2012:

Ginger is her good 'ole diva self again!
She has been laying shell-less eggs from the roost. Her 1st egg was about 2 days after treatment stopped. She "laid" 2 eggs in 24 hours. The next day was also 2 but, one was shell-less and very thin membrane!
Not sure if it is bad because she is not laying in the nest boxes or good because she is not laying in the nest boxes. Hmm... I say good for lack of busted shell-less eggs in the boxes!


Info I used for drug info:
http://www.drugs.com/pro/sentry-av-ornacyn.html

The following is a detailed medical research of the drug in poultry, cattle and humans etc... very detailed and technical but extremely useful!
ftp://ftp.fao.org/ag/agn/jecfa/vetdrug/2-2006-erythromycin.pdf


NOT INTENDED AS MEDICAL ADVICE Disclaimer.


Joined the Barn Hop
http://homesteadrevival.blogspot.com/2012/05/barn-hop-61.html

Friday, April 20, 2012

Predator Sounds in the Night and Tracks

Ok folks!


Here is the story...

Last night around 10pm I heard strange loud noises outside the kitchen window. It came from the direction of somewhere between the new garden area I just fenced and the chicken coop. I thought maybe it was something caught in the fence or something fighting, maybe raccoons fighting. Well... in the area of my coop I got a bit worried and opened up the window to get a better hear. What a ruckus. I went to the basement to grab a light of some-kind and hubby got a wimpy little flashlight - all we had (I have got to get a flood spotlight for this place).
By the time be and my hubby went out the front door to see what it was (and use the car headlamps to get a view) the ruckus was gone. No sign of damage to fence or to the coop.

I was curious to find out what the sound was and I found these 2 you-tube videos that sounded very similar to what I heard.

http://www.youtube.com/watch?v=J6NuhlibHsM - gekkering noises at 1:13
and
http://www.youtube.com/watch?v=mZOyrKgDiNU - fox fight


I concluded that the ruckus was most likely foxes fighting. The other thought was raccoons but, the raccoon noises are too high and chattery than what I heard. Near my coop! Ugh - glad foxes cant get in there when they are locked up at night!


Here is where I need someone with PNW experience on this...

I went out this morning to get a better look.
No damage to fence.
No signs of damage or digging around coop or run. No prints in run.

I went further and inspected the compost area. Possibly fighting over scraps in one of the piles.
There is where I found a print. I found 2 but the other one was just a general impression in soft leaves and was basically a size and shape outline.
the 2 prints were about 3-4 feet apart.

I took photos of the distinguishable print. it was slightly smaller than my fist and had no claw marks. That is where I got a little concerned. I know that canines leave claw marks and are not as big as my fist. I went back in and did some research and I think it may be a cougar. The sounds last night were definitely NOT cougar sounds. But the print does leave me with some concern. We are in known cougar territory after-all.

click on photo to make bigger


Do these look like cougar prints to you?

Looks like I may need to invest in fencing in around the house and coop and getting some livestock dogs.
(shameless plug - If you want to help my fence and dog fund, purchase something in my shop. Link to my shop is in upper right corner of page)

And please leave a comment if you have any advice or thoughts on this post.

Tuesday, April 17, 2012

Deer Fence 2 . 0


So...
Version 2 of the deer fence is underway.
(see post "Deer Fence" in 2011 for the 1st version)

Easy Gardener Xtreme Deer Barrier
pretty robust
I have purchased a more expensive (and robust) fencing.
I only bought 100 feet because of the cost. It will fence the blueberry hill and the front section. This would get the most deer impact. It will be a trial. If it holds up I will get another roll for the rest of the garden.

the Xtreme compared to the net bought last year  - big difference
It is noticeably stronger than the net but not the strongest available.
This product is fencing, not the net advertized as fencing that I got last year.

I purchased it from Amazon. The price was good. It came in 2 days after placing the order! Wow - I was very happy. It comes folded in half on a roll and wrapped in thin plastic.

I have done a few things different this time.

1 - installed a top-wire
     I bought a roll of wire at the hardware store and installed it along the top of the posts by wrapping it around the eye -screws and pulling it straight but not too tight. Then fastened the fence to it with 4" zip ties.

2 - used #10 eye-screws instead of staples. Used 4 for each post. fastened the fence with the zip-ties.

3- I used a dry gravel method of setting the posts. Dug down, set gravel in bottom, filled around the post with gravel and large stones, leveling the posts and packing the gravel as i filled the hole. Might regret nor setting in cement later. though thought it best to use this method cause i might have to move the posts later?


Onto the installation...

planning out the posts
It was fairly easy. The fence had stiffness to it and didn't get caught on everything like the net did.
It is 8 feet tall and I kinda centered it so that I had between 6-10 inches on the bottom and on the top.
I want the extra on bottom to flare out on ground outward to deter nosing under by the deer. I wanted a bit at the top for extra height. You can fold it down or better flare it outward at the top. I may end up doing the later down the road but am not too concerned right now. It is stiff enough to stay up fairly well at this point and the deer are not too interested in jumping.
finally up

I installed eyescrews on the posts. Installed wire on the top. Fastened the fence to the eyescrews and topwire with 4" black zip ties. Right now the bottom flare is being held down with logs and big rocks.

I used the old net along the rock wall and herb garden side 1 - because i did not buy enough to do the whole area due to price and 2 - that is the side that gets less deer impact. they typically travel from the front side and along the forest side.

Now to plant the blueberries and the rest and see how it holds up.


Wednesday, April 11, 2012

To Texas For Spring Break 2012

Our trip to Texas 2012

Let me start with our welcome home.

After "roasting" in Texas ;-) , We were greeted with a cool 65 degrees and sunny. Mount Rainier was dressed in her snowy white and wearing a Sunday hat , and soaking in the setting sun.

The next morning was sunny and crisp. I went out to enjoy the fresh mountain air and was buzzed by the Rufus humming birds. They did not like me on the porch and chipped heartily at my proximity. I saw deer in the distance and it saw me. Suddenly it broke into a full trot straight at me from the other end of the meadow. Must be Apples. No other deer would run towards a human. I got some apples slices and fed him.

The chickens were still locked up and they heard me chatting to the deer. I heard them jump down from the roost and they started yelling at me from just behind the closed door. I had read somewhere that chickens only have a memory of a week. I was expecting them to forget me but, they didn't! They recognized my voice and still treated me as their "rooster". They would squat at my slightest movement. I let them out for a long deserved forage in the lawn.

Even with my eyes and head still aching from the miserable head cold, It was a warm welcome. It is good to be home.

Now for the trip and the people and things I will miss...

Monday
4am
We had packed up the nite before so we could make a clean go of the trip the next day.
Woke up at 4am and out the door by 4:30am. Parked at the SeaTac airport thanks to a spring break coupon for garage parking. Very convenient!
Checked one bag and through security with no issues.
We had breakfast and coffee in terminal and waited for our flight.
Flew to LAX on Virgin America.

Review of Virgin America:
Great! If I can fly with them again I would. Why?
Seats - Comfy, Leather, adjustable winged headrests make napping easier, larger width and legroom than AA or Delta, entertainment in every seat - pay extra or free options - enough to entertain my 8 year old who didn't pull out her ipod or gaming system - watched Disney channel and the flight info the whole way and napped to classical comercial-free radio. You can order from your seat too - food and drinks. Cute and funny safety video.
Planes: newer than most, cool lighting
 Service: friendly - Bonus: one leg even let those with no overhead luggage to board with cabin select (after 1st class). Very nice! Boarding went so fast that time!  I HATE having to wait for overheaders! I am sure 1st class doesn't like it either.
Anyways... just go to their website For all the other perks.

Back to the trip...
My husband firmly punches me on the shoulder as we pass 1st class seating. "That's Kevin Smith! That's Kevin Smith! Oh my god! I can't believe it that's really Kevin Smith!" He says in a restrained, yet extremely excited voice as we move through to our seat in the back. Apparently he saw the actor/writer/producer/director etc..  Kevin Smith on our flight to LA. For those unfamiliar, I have provided this link : IMBD
We ate lunch in LAX in our terminal because you cant leave terminals there without going through security again.
On our way to DFW was a little rougher with the turbulence over New Mexico and the bratty toddler behind us that whined loudly if he didn't get his way immediately!

Mom & Pop picked us up and we had dinner at Dino's Steak and Claw House in Grapevine, TX.

Review of Dinos': Great again.
Jumbo Sea Scallops - sweet, tender, juicy with a sweet caramelized sear, perfectly cooked - Just YUM
Baby Spinach Salad - good but a little too much dressing for me - i like it on the lite side.
Lobster Bisque - Great again - this time it tasted like caramel soup with sea salt. Usually you can taste the lobster.
We went on a coupon and got half off our ticket - definitely worth it with coupon.
If no coupon, I might reserve this for a splurge due to prices.
Service is always great - if any omissions or mistakes are made they go above and beyond to remedy.

Drove back to Waco

Tuesday:
Visited Baylor and ate lunch at one of my Waco faves: Clay Pot. Since I have already reviewed this place on Waco Fork you can read it there ("Little Pink Gem on I-35"). It was a beautiful day so after a visit to the bear pit, we walked to the restaurant via the drainage ditch.  Yeah, but it's a pretty cool drainage ditch - see photo on left.
 We watched the spring storms come in. Something cool to watch but we don't' miss the annual springtime stress of tornado weather. Every spring we used to pack an emergency box with water, snack bar, cellphone, radio, flashlight and other important items and hide them in the shelter closet. The shelter closet stuff would be moved around and relocated. The couch pillows on-call for the sound of the sirens. Waiting in shelter and praying nothing comes of it. Knowing the shelter is just a last-ditch effort to reduce damage. Knowing if you get a direct hit, you most-likely won't make it. 
Today, we just got cool clouds and an oncoming cooler wind. Unfortunately, parts of our old stomping grounds were not so fortunate as parts of Tarrant and Dallas county lost property and lives.


We had dinner, watched the Lady Bears basketball team win the national championship game 40-0! Go Lady Bears! Also colored eggs with my brother and his lovely wife.


 Wednesday
TX hill country Spring
We went to Brenham to visit family.

On the way we stopped at Louie Mueller BBQ in Taylor.

Review: Louie Mueller BBQ, Taylor, TX
I am not linking this place because it was not good.
I Really truly don't understand why this place has gotten so much hype!
Lets start at beginning...
Place has dive charm. The smoke everywhere smells great. Meat market serving is how it should be. Tea - no sweet available - no biggie 4 me 'cause  don't drink it sweet but this IS Texas - gotta have TX sweet tea at a BBQ joint!
We ordered a bit of almost everything and all the sides and shared family style.
Carvers were nice. But, server ladies treated ya' like you are stupid.
No beer! What!? - Beer brand signs all over the place but - no beer with Tx BBQ?
The dive feel was nice but... flies flying all over your food and holes in the screens has to be a health violation.
no smiles at Louie Mueller "BBQ?" in Taylor, TX
  Brisket good - not the best I've had but, good. "Sauce" was basically hot water with some onion and red pepper powder. No flavor and NOT Texas style - that is a mop - NOT a sauce. Serving a mop with BBQ is NOT TX STYLE it is TN style.

That was it - the rest was just really gross. Bland, sides, dry, over peppered ribs. Under-cooked, bland potato salad. Beans were TERRIBLE - I love baked beans but these were nowhere near them. They tasted like canned pintos out of a 20 year old can! Truly NASTY!. 
 Summary= don't go out of your way. this is NOT a good BBQ joint! If I were local I probably still would not go there for BBQ.

 Now onto happier thoughts...

We also stopped at the Blue Bell Creamery - Mmmm. Icecream.


Thursday:

We visited my brother at work and ate lunch at the Homestead Heritage Cafe'.

Review: Homestead Heritage Cafe' Just scroll down to "I agree" on Waco Fork - What is there to review? Everyone else did it for me. The place is great. This time though, the soup was a too salty - couldn't' eat it but was full up on everything else anyway.


Let the kid and hubby walk the shops while I enjoyed a chat with mom under the mountain cedars.

Back at "the ranch" we rested up and I enjoyed the bunnies and moms' garden.

BTW... Mom, your garden looks awesome! I sure would like your gardener to do my place ;-p -  wink!


Friday:
Headed to Fort Worth. Ate lunch at NYPD, in Euless, Tx

NYPD Review: usually I love this pizza. it was still good but it had changed from what I remember. It was dry and saltier this time. Not the usual NY pizza crust soft and floppy, lots of sauce.

Visited with a few folks around town.


Stayed with some great friends and enjoyed their company and hospitality! Thanks so much! It was great to see you again!

Headed back Sat morning for a long day of flying.

Bummer part - didn't get a chance to eat some good Tex-mex :-(
I'm going into withdrawls - ahhhh!

It was nice to be in the warm and surrounded with green and flowers in Texas (our deciduous trees had just begun budding back home).

I will miss you all!